Southern Chic

3.04.2011

Spring Wreath

The weather here has actually felt a lot like spring lately so I went ahead and made my Spring/Easter wreath for my door. I love how it turned out and it was SO easy.
What to make one for your front door?

Here is what you will need:
a grapevine wreath (I found mine at the thrift story for 49 cents!)
a bag of wooden eggs from Michaels or your local craft store
ribbon
a wooden letter
hot glue


My "G" was in the $1 bin at Micheal's and had a little hook on it. I just use my screwdriver to take the hook off.

Then I just started hot gluing the eggs on the wreath. I love the pastel colored eggs rather than the bright ones.


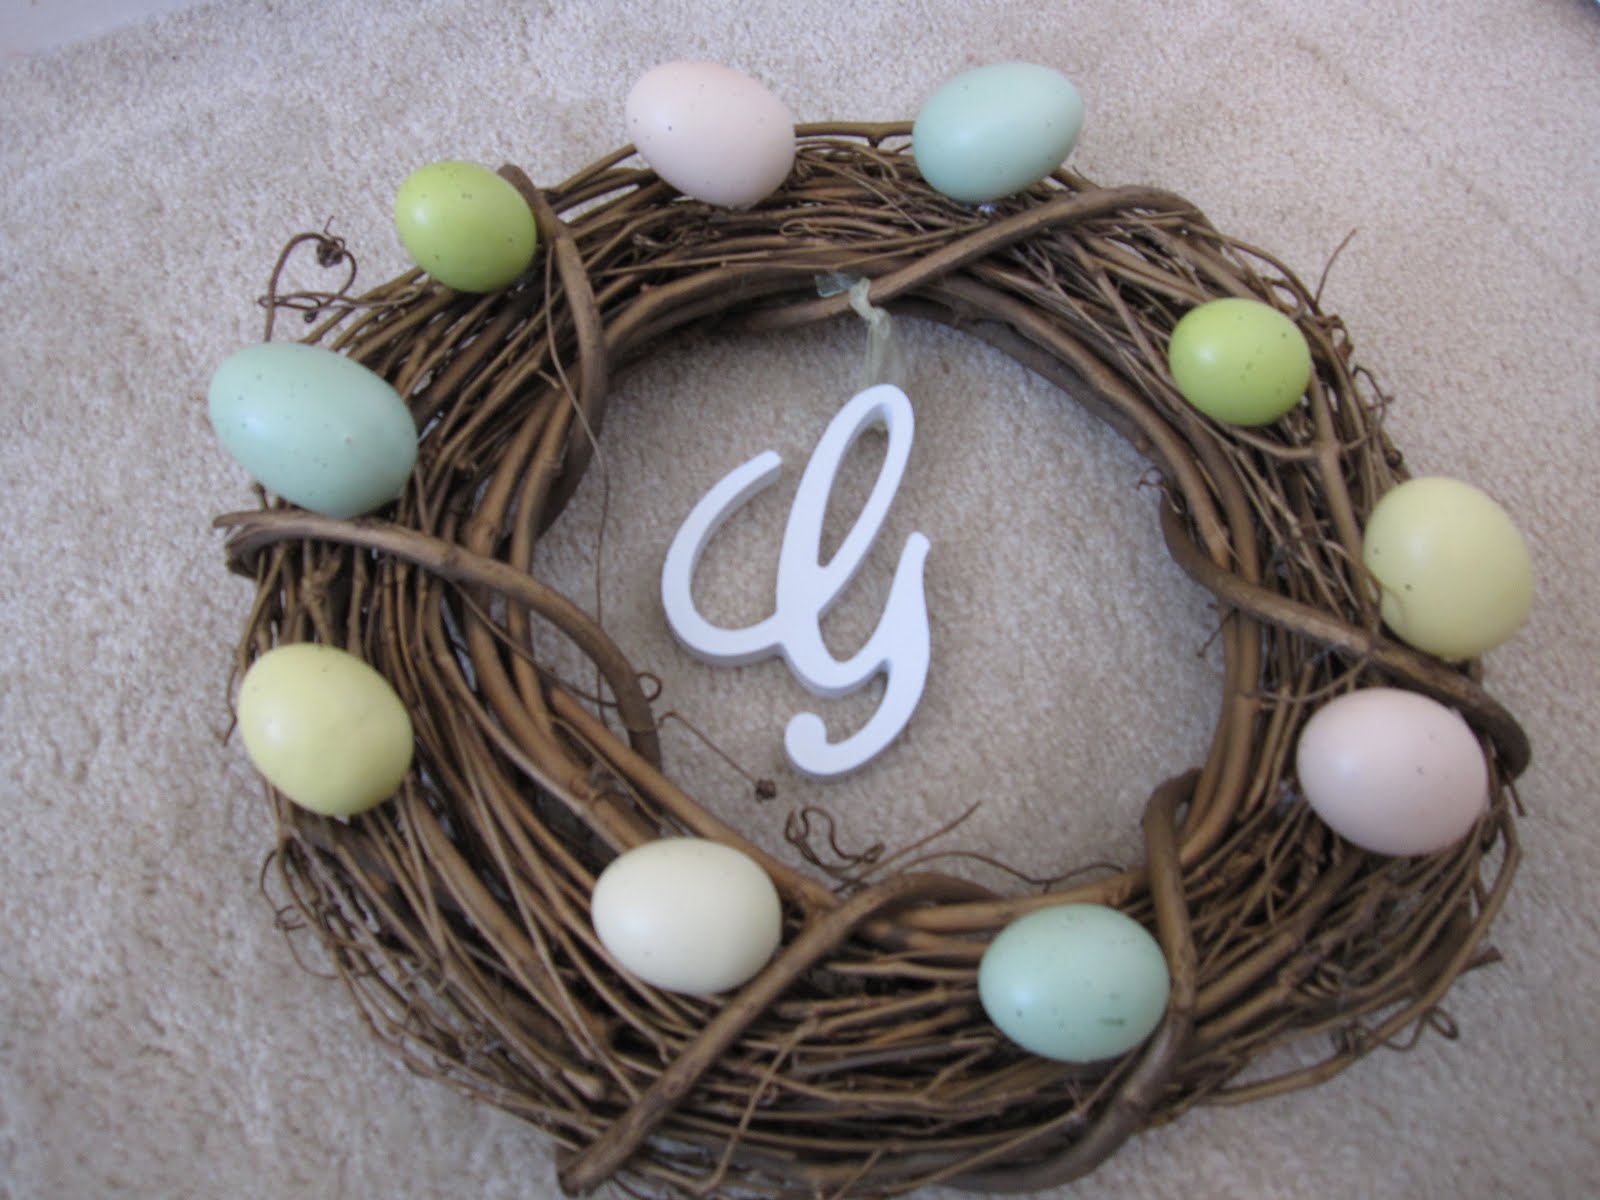
Then I glued the ribbon to the G and then tied it on the wreath.

I love how it turn out. It definitely adds some "Spring" to our front door.


-Amelia

2.26.2011

Headband Tutorial

A sweet friend of mine asked me to make her a headband.
She wanted it to be black with a flower.

To make your own you will need:
knit fabric
scissors
hot glue/needle and thread
headband
button
felt

I started by cutting 8 circles out of my knit fabric. It's okay if the circles aren't perfect. You can trim them up later. I just used an old ribbon spool to outline the size of my circles.


Then fold the circle once in half, then in half again. It will look like a pizza (or a petal.)


Then cut a circle out of felt. This circle needs to be slightly smaller than the others.


Then start arranging 4 of your petals on your felt. I chose to be lazy and hot glue them to the circle, but you can certainly sew them on.


Then arrange the second layer of petals and hot glue those on.

(sorry for the blurry picture...not sure how that happened)

Then hot glue a button to the middle.

Give it a gentle shake to make the petals fluff a little bit and your flower is done.

Now, hot glue the flower to your headband and place another piece of felt on the back. (I forgot to take a picture of this, but you get the idea.)


I hope she likes it!
I can't wait to make some more in different colors.


-Amelia

2.21.2011

Saving the Dinner Party

My adorable friend Maribeth sent the link to this blog to me.
I absolutely love what the article says about the Dinner Party.

My grandmother actually kept a notebook of all the menus from her dinner parties, as well. I remember looking at it when I was younger.
I called her when I read this and told her I needed to read it again.

In the 2 years that we have been married, I have used my china 1 time. I think that's sad.
Casual parties are fun, but it is also fun to get dressed up(or not...) and use the fine china.

We are having some friends over on Thursday for dinner...maybe I will break out the fine china! And maybe I'll start a notebook....

I encourage you to do the same.
Let's save the tradition of the Dinner Parties that our grandmothers used to have! :)

Here are some beautiful tablescapes to leave you with.

(Picture from Between Naps on the Porch)

(Picture from The Decorologist)

(Picture from Design Sherpa)
-Amelia

2.20.2011

Storybook Baby Shower

Yesterday was the last shower in what I most fondly called "Baby Shower Month." My dear friend and roommate from college is having a baby girl and since we were all teachers we decided to have a Storybook theme. I got the idea from this website.

Our decorations included the stuffed animal book characters from Kohls (LOVE THOSE) and little printed book covers.


Even our Menu followed the theme.

This was our menu:
Breakfast Casserole
(Green Eggs and Ham)
didn't get a picture of this :(

Goldfish
(The Rainbow Fish)

Chocolate Chip Cookies
(If You Give a Mouse a Cookie)

Banana Bread
(BANANA)

Fruit
(The Very Hungry Caterpillar)

Pink Lemonade
(Pinkalicious)


And this was the beautiful cake made by one of Laura's friends. It was so tasty!!
(Bunny Cake)

(From Left- Laura, Sarah, Misa, Me)

We had a blast hosting this shower for Misa and we can't wait to meet little Miss Lilly!!


-Amelia

2.12.2011

Baby Shower Gifts

It's been a while folks. Sorry about that! The past few weeks have been very busy!!
I have named February-Baby Shower month. I have 5 baby showers to attend this month. I wanted to give each one of them something special and homemade so in all of my spare time I've been at work on my sewing machine.
I'm so sad, but I didn't get a picture of the little Kimono booties that I made for my friend Allison. Her shower was last weekend and I finished them just in time to wrap them!
Anyway, I used this tutorial and they turned out so adorable!!

I also made some bib and burp cloth sets. I just drew the pattern for the bibs and then used store bought cloth diapers with fabric for the burp cloths. I hope they will enjoy them.

Here are the sets I made for the boys:

I paired them with a little wooden toy race car I found at Target.


Here are the sets I made for the baby girls:
couldn't resist the ruffles! :)

Can't wait to share some other things I have been working on!
Check back soon!!

Have a great weekend!


-Amelia

1.23.2011

Sunday Scripture

I have sung this song many times in church, but yesterday I was listening to it in my car and God really spoke to me. I found this video and wanted to you to watch it too!


God's love NEVER fails, even when I turn away
and HE make all things work together for my good


How incredible is that?


-Amelia

1.22.2011

Homemade Bagels

If you haven't noticed already, I love breakfast. I wake up starving and ready to eat. My husband doesn't understand it. He could care less about eating first thing in the morning. He doesn't get hungry until around 11, and by then I am ready for lunch. I think it must come from teaching Kindergarten for 4 years and having to eat lunch at 10:00.

Anyway, after our Girls' Trip to Asheville last week I have had a craving for bagels. My sister-in-law, Ashley, and I went to City Bakery every morning for a bagel and a cup of coffee. They had these incredible Oatmeal Bagels. They were so delicious with some yummy cream cheese.

So last night, I decided to try making my own. It was so easy! I was pleasantly surprised at how quickly they came together.
It is a bit of a process, but if you have the time you should definitely give them a try.

I used this recipe from AllRecipes.com. I used the suggestion in the comments section and used whole wheat flour and oatmeal.

Mix the dry ingredients in the mixer, then add the wet. Mix for 3 minutes and then placed on a floured surface and knead for 8-10 minutes. Let it sit for 15 minutes. Then form into little balls. Poke a hole through the center and slowly form the bagels around your finger. Let those sit for 20 minutes. While you are waiting, boil some water and add 1 tablespoon of sugar.
Boil the bagels 4 at a time for about 7 minutes.

Place on a greased cookie sheet.

At this point I added some Cinnamon Sugar to some of the bagels.
(I'm going to work on making them prettier and more of a bagel shape)

Bake at 375 degrees for about 30 minutes. I let them cool completely and then stored them in a container for breakfast this week!

They are delicious and see, they really aren't hard!
Mine turned out to be the same size as the Mini-Bagels that you buy in the store,
but that was just perfect for me.


Yummy with my morning coffee...go make some of your own!

Here is the final recipe with all of the changes:

Oatmeal Honey Bagels

Ingredients

  • 1 cup white flour
  • 2 cups wheat flour
  • 1.5 cups of ground oatmeal
  • 4 tablespoons honey
  • 2 (.25 ounce) packages active dry yeast
  • 1 1/2 cups warm water (110 degrees F/45 degrees C)
  • 3 tablespoons white sugar
  • 1 tablespoon salt
  • 1 tablespoon white sugar

Directions

  1. In large bowl, combine 1-1/2 cups flour and yeast. Mix water, 3 tablespoons sugar and salt together, and add to the dry ingredients. Beat with a mixer for half a minute at a low speed, scraping the sides of the bowl clean. Beat at a higher speed for 3 minutes. Then, by hand, mix in enough flour to make a moderately stiff dough.
  2. Turn out onto a lightly floured surface and knead until smooth and elastic (8-10 minutes). Cover, let rest for 15 minutes.
  3. Cut into 12 portions, shape into smooth balls. Poke a hole in the center with your finger, and gently enlarge the hole while working the bagel into a uniform shape. Cover, let rise 20 minutes.
  4. Meanwhile, start a gallon of water boiling. Put 1 tablespoon of sugar in it, mix it around a bit. Reduce to simmering.
  5. When the bagels are ready, put 4 or 5 bagels into the water, and cook 7 minutes, turning once. Drain them. Place on a greased baking sheet, and bake at 375 degrees F (190 degrees C) for 30 to 35 minutes. Remove from oven, eat hot or cold.
  6. Broiling option: For a glossier surface, place raised bagels on an ungreased baking sheet prior to boiling them. Broil them five inches from heat for 1 to 1-1/2 minutes on each side. Then put them into the hot water to be boiled as above. Note: do not bake broiled bagels as long as non-broiled ones, 25 minutes should be long enough.

-Amelia